

How to Hang Wallpaper: Tips & Tricks
Posted by admin on
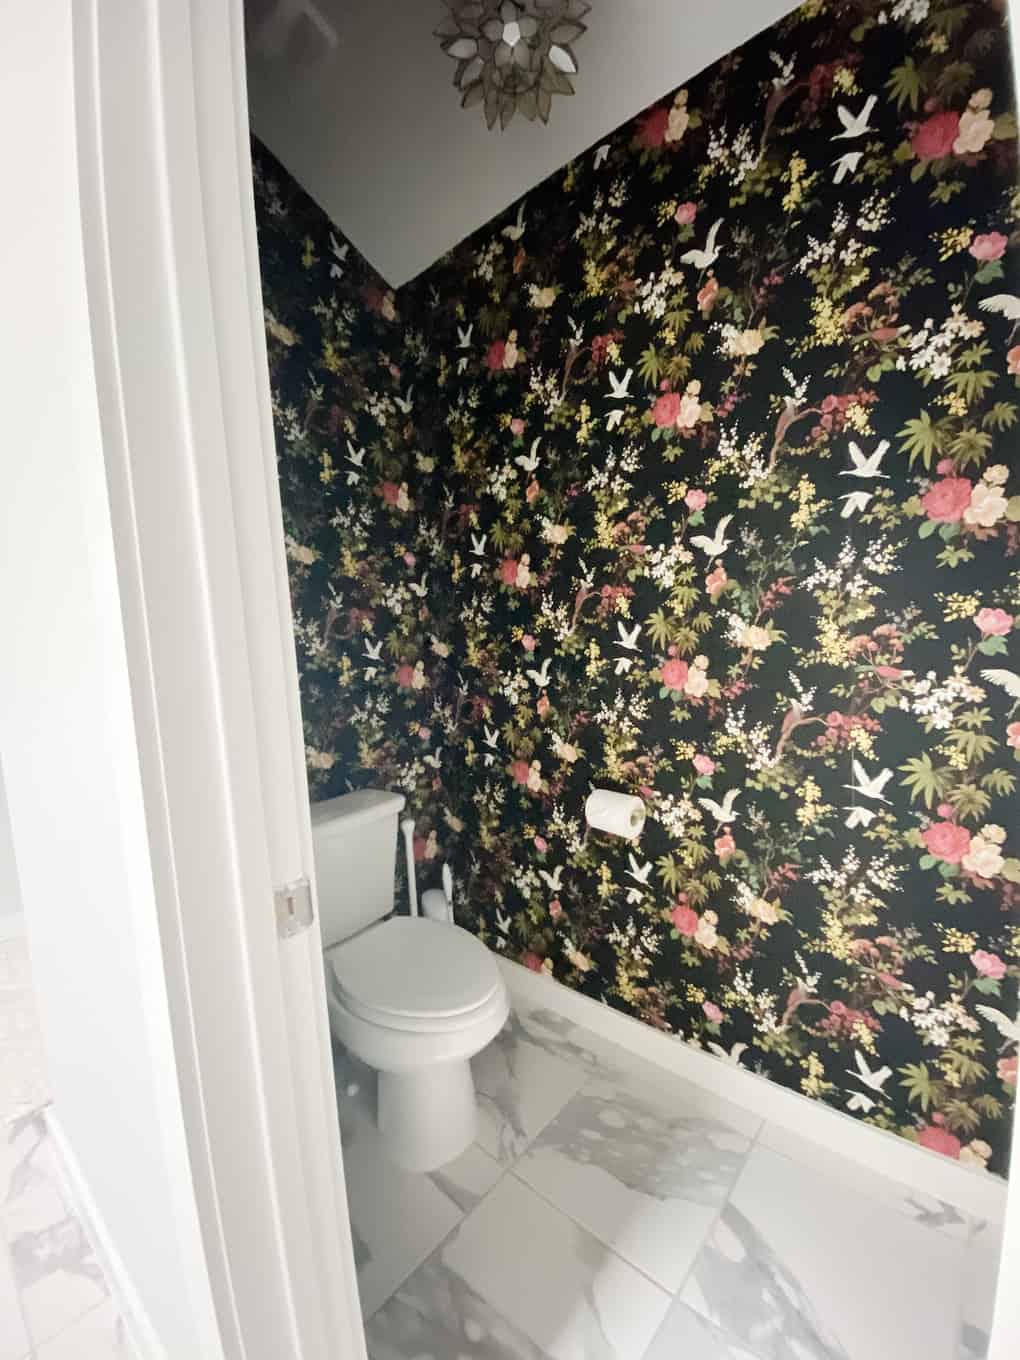
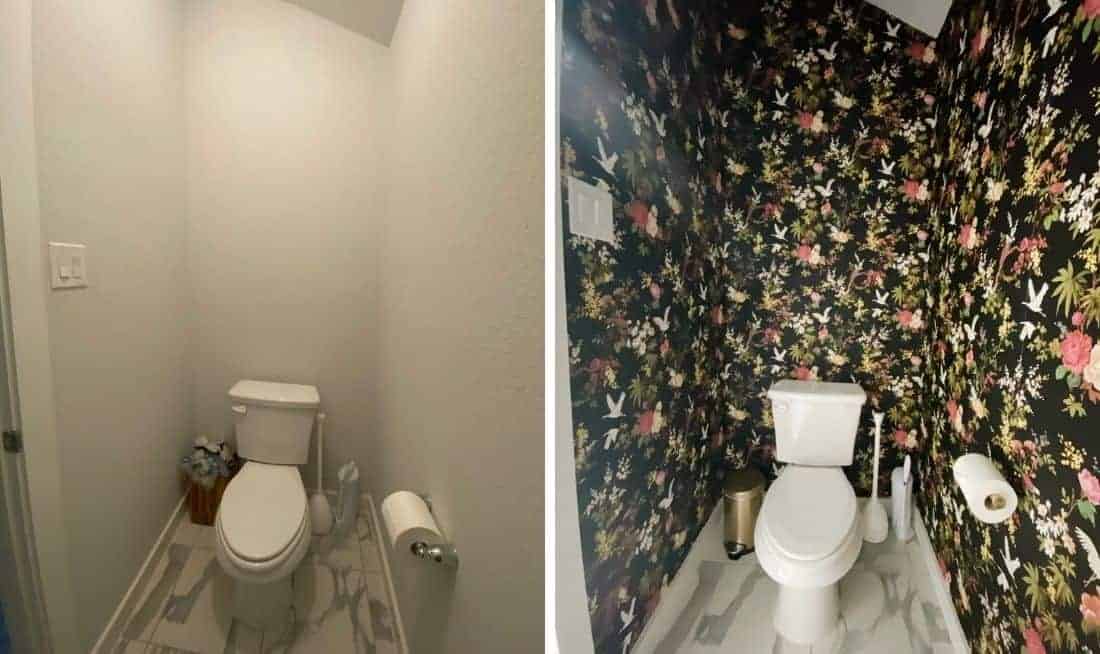
I just finishing hanging some gorgeous, black floral wallpaper in the water closet in our primary bathroom and I’m here to share aaaall the after photos and my best tips for how to hang wallpaper.
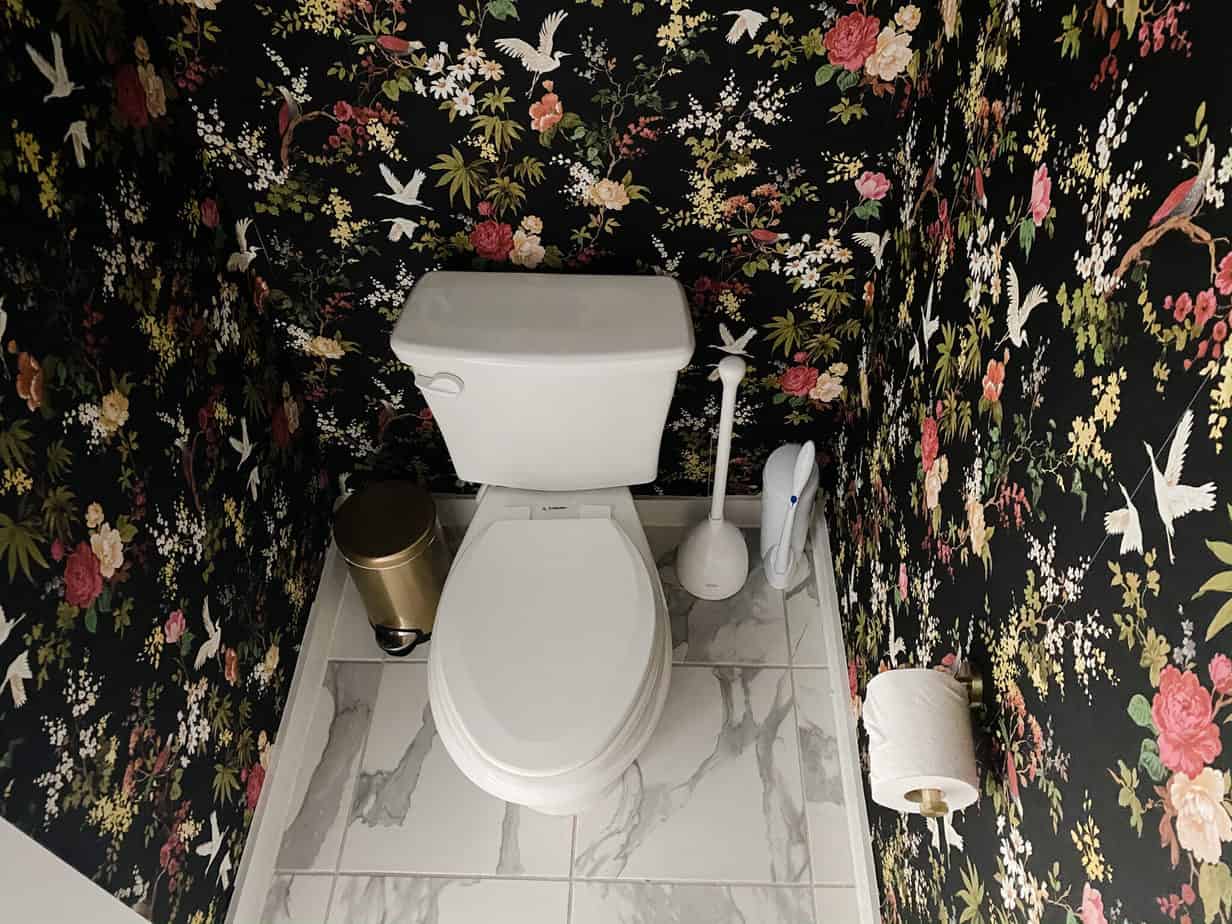
Ever since the day we purchased this house, I’ve envisioned black floral wallpaper in the toilet room in our primary bathroom. We’ve never had a bathroom with a separate water closet, and I knew from the beginning I wanted it to stand out and feel special. And, what feels more special and unique than a super bold, black wallpaper?!
I finally got to tackle this project last week and it’s exactly as good as I imagined it would be. I cannot stop walking into my bathroom to stare at it, and it just makes the entire space feel a little cozier and more special.
Today I wanted to share some of the tips I’ve learned about the best way to hang wallpaper – keep in mind, I’m not a pro. If you want an absolutely perfect wallpapering job, you should absolutely hire a pro. This is the sort of job that isn’t easy to get exactly right, and if you’re going to hang wallpaper on your own you need to be prepared to be okay with a few imperfections!
I’ve talked hanging wallpaper here before – if you want to see my full and detailed tutorial for how to hang wallpaper, just head to this post for all of the details. But, if you’re doing research I fully recommend you also read this post right here for my updated tips and tricks! I’ve learned a lot since my first wallpaper hanging job, and this post combined with the tutorial linked above should have you feeling really confident to dive into your wallpaper project!
Wallpaper | Light | Gold Trash Can
Wallpaper Hanging Tip #1: Plan Ahead
One thing I’ve learned in my (brief) wallpaper hanging career is that it is really tricky to line up the pattern of your wallpaper when everything is up on the wall.
This time around, I decided to try a fresh approach and instead of lining up and cutting each strip of wallpaper while it was on the wall, I laid the strips out on the floor, then I lined up the pattern and cut them while they were horizontal.
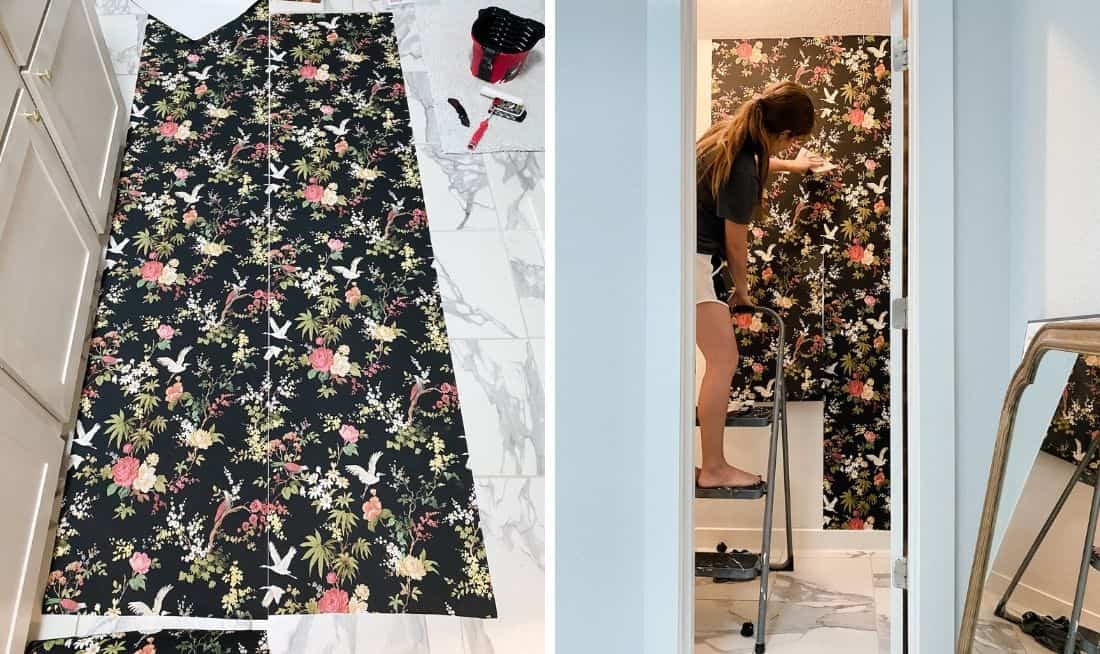
For the first strip, I simply measured the height of the wall and added about 1.5″. Then, before I installed it I went ahead and lined up the next piece and cut that. After hanging the first piece, I cut the third strip before I hung the second.
Doing it in this order made the entire process feel far easier and less stressful, so I highly recommend this if you’re hanging wallpaper!
Wallpaper Hanging Tip #2: Make sure your first strip is straight!
This is so, so important. If your first strip isn’t straight, none of your wallpaper will be straight.
The best way to get a perfectly straight first piece of wallpaper is to start in a corner and measure out the width of your wallpaper minus one inch. You want there to be a slight overhang into the corner, but not too much (or else the wallpaper can pull away in the corner). Make a mark on your wall at that point, then use your level to help you draw a straight line all the way down the wall.
You can see more about this tip on this post right here – but I felt it was worth re-iterating!
The reason you do this instead of just referencing the corner the whole way down is that corners aren’t always perfectly straight, and if you rely too much on it you may not end up with a straight piece.
Once that first piece has been hung and you’re confident it’s straight, you can just use it as reference for the rest of the strips and you’re good to go!
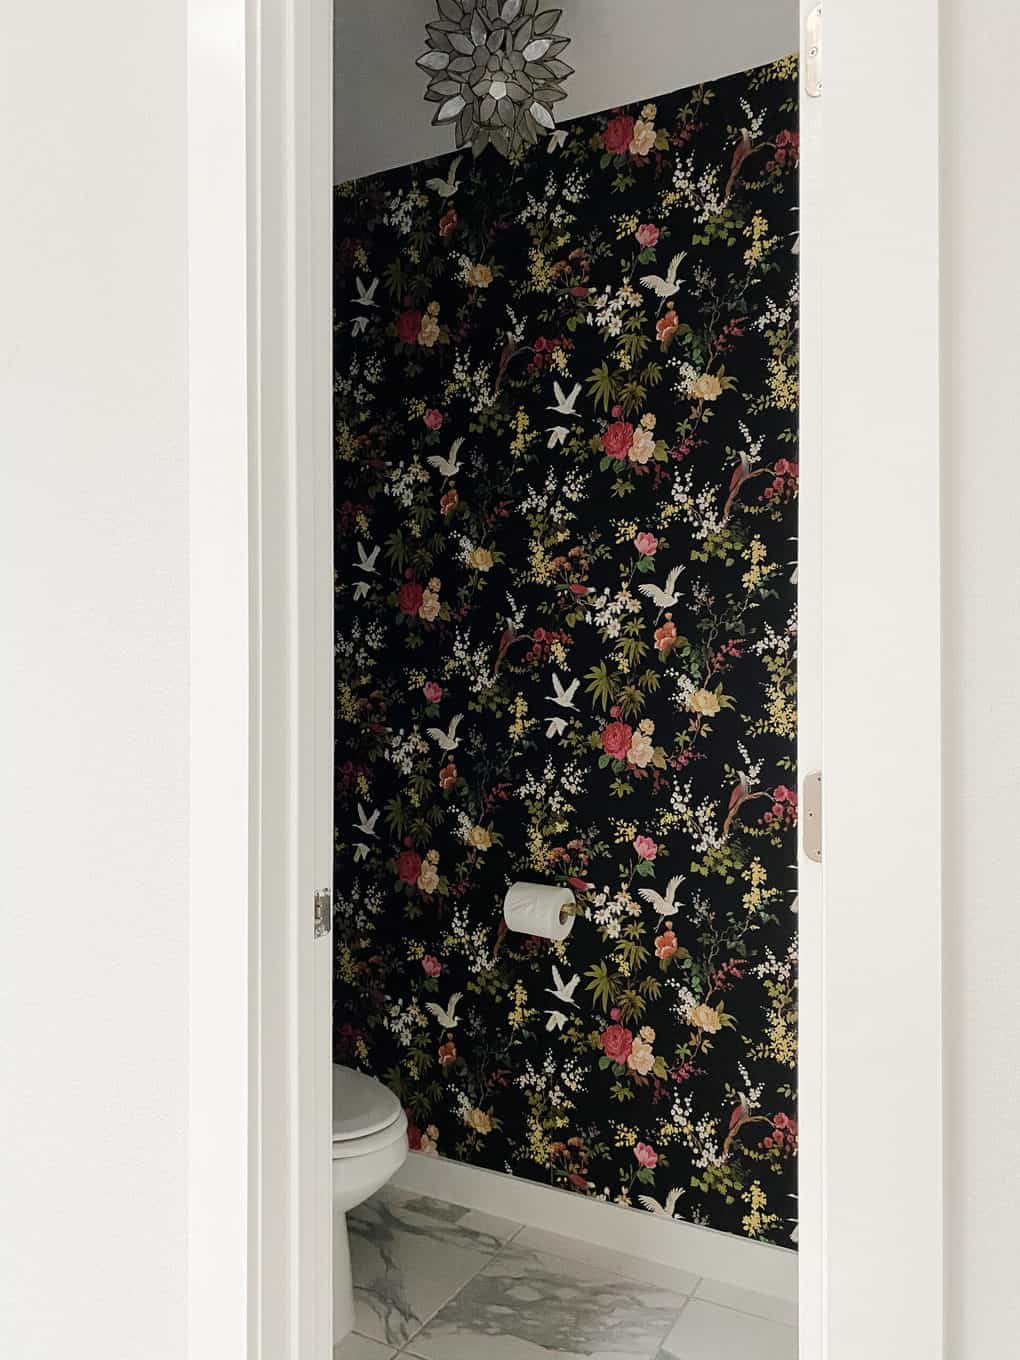
Wallpaper Hanging Tip #3: The end may not line up!
This was my first time hanging wallpaper all the way around the room, and I woke up one night a couple of days before I started in a panic as I realized it was almost impossible that the wallpaper would make it all the way around the room and end perfectly on a full sheet where the patterns lined up.
I’m not sure why I had never considered it before, but I couldn’t sleep until I figured out how to address it.
I did a bit of googling and found that it’s kind of par for the course when wallpapering around a room. I’m sure the pros have a great way of dealing with this, but as a total amateur I decided to just do what made the most sense: make sure the misaligned pattern happened in the least conspicuous place possible!
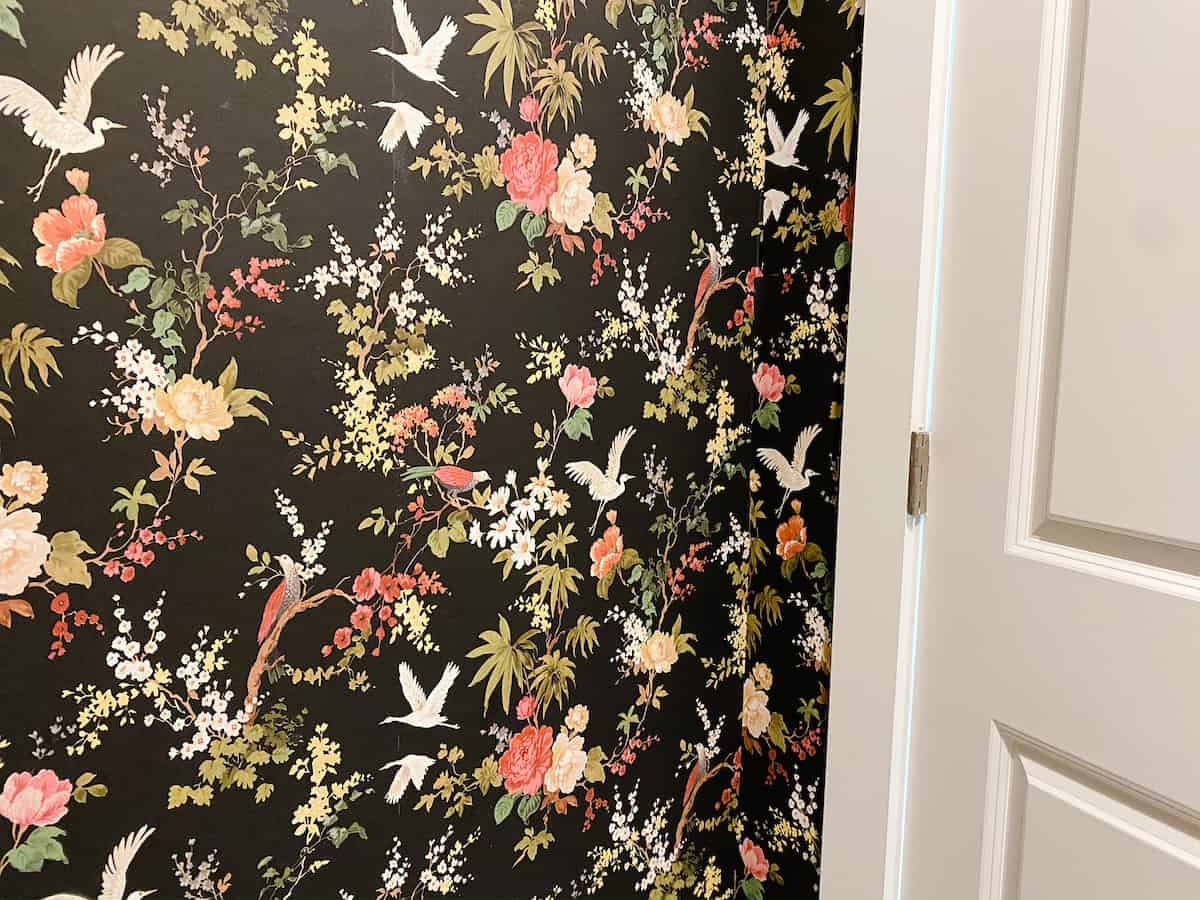
I started my wallpaper in the corner behind the door so that I’d end back there when I made it around the room. The misaligned seam is only visible when the door is closed, and it honestly bothers me far less than I expected it to!
If this is something you’re really concerned about, I recommend you stick with a simpler pattern (a geometric pattern, or even a plain color won’t show this issue!).
Wallpaper Hanging Tip #4: Stick to traditional wallpaper for textured walls
We have knockdown texture on our walls, and I got lots of questions about if wallpapering over texture is even possible.
The short answer is, yes it is!
This is a case where a professional would likely skim coat over the walls to smooth things out before beginning, but this is my fourth time wallpapering over textured walls and it’s worked out just fine every time!
The only caveat I’ll give you is this: I don’t recommend using peel and stick wallpaper on textured walls. It doesn’t stick quite as well, and you’ll have more issues in the long run if you go for peel and stick over the traditional, pasted wallpaper.
Another thing that might surprise you? I find pasted wallpaper is much easier to work with than peel and stick! You can shift it around on the wall up until the paste dries – and with peel and stick it’s more like a sticker where you have to align it perfectly before you press it into place.
I recommend using pre-pasted or unpasted wallpaper for textured walls. This is the wallpaper paste I used for this (unpasted) wallpaper.
Wallpaper Hanging Tip #5: Don’t forget to prime!
My final (and maybe most important?!) tip for you is that you should always prime your walls prior to wallpapering. I had never done this before, but I’ve learned that it’s an important step for really great adhesion. Another bonus? When you eventually take the wallpaper down, it’s much easier to take it off if the wall has been primed ahead of time!
I used Zinsser BIN Primer to prime my walls because I already had it on hand. But, using an actual wallpaper primer will probably give you even better results.
And that’s everything I learned about how to hang wallpaper from this little project.
I’m still faaaaaar from a pro wallpaper installer – there are some visible seams and areas where things don’t perfectly line up, but overall I’m so happy with how it turned out and I’m pretty proud of myself!
So, what’s left in this little phase one bathroom makeover?
- Hanging shelves above the toilet for extra storage
- Adding a linen cabinet
- Replacing the builder-grade mirror
- Adding art + accessories
Be sure to follow along on my Instagram stories if you want to watch all the fun happen in real time! And, you can catch up on everything that has happened so far below:
The post How to Hang Wallpaper: Tips & Tricks appeared first on Love & Renovations.